After getting my pilot's license, I still feel very much like a noob. There's just a lot of things that doesn't get covered during regular training: extended cross-country flight planning, mountain flying, landing at a high elevation airport and take-off and landing in an actual busy/international airport (a.k.a. the airports everyone actually knows or as pilots call them, Class Bravo Airports).
I found out about this group on the FAAS website. After listening to the talk, thinking I can at least steal some trip ideas and planning ideas out of it, I found out we can actually make this work even I'm not a member of that flying club, I've decided to actually join the group, actually fly to those locations, practice those advanced topics!
The Trip
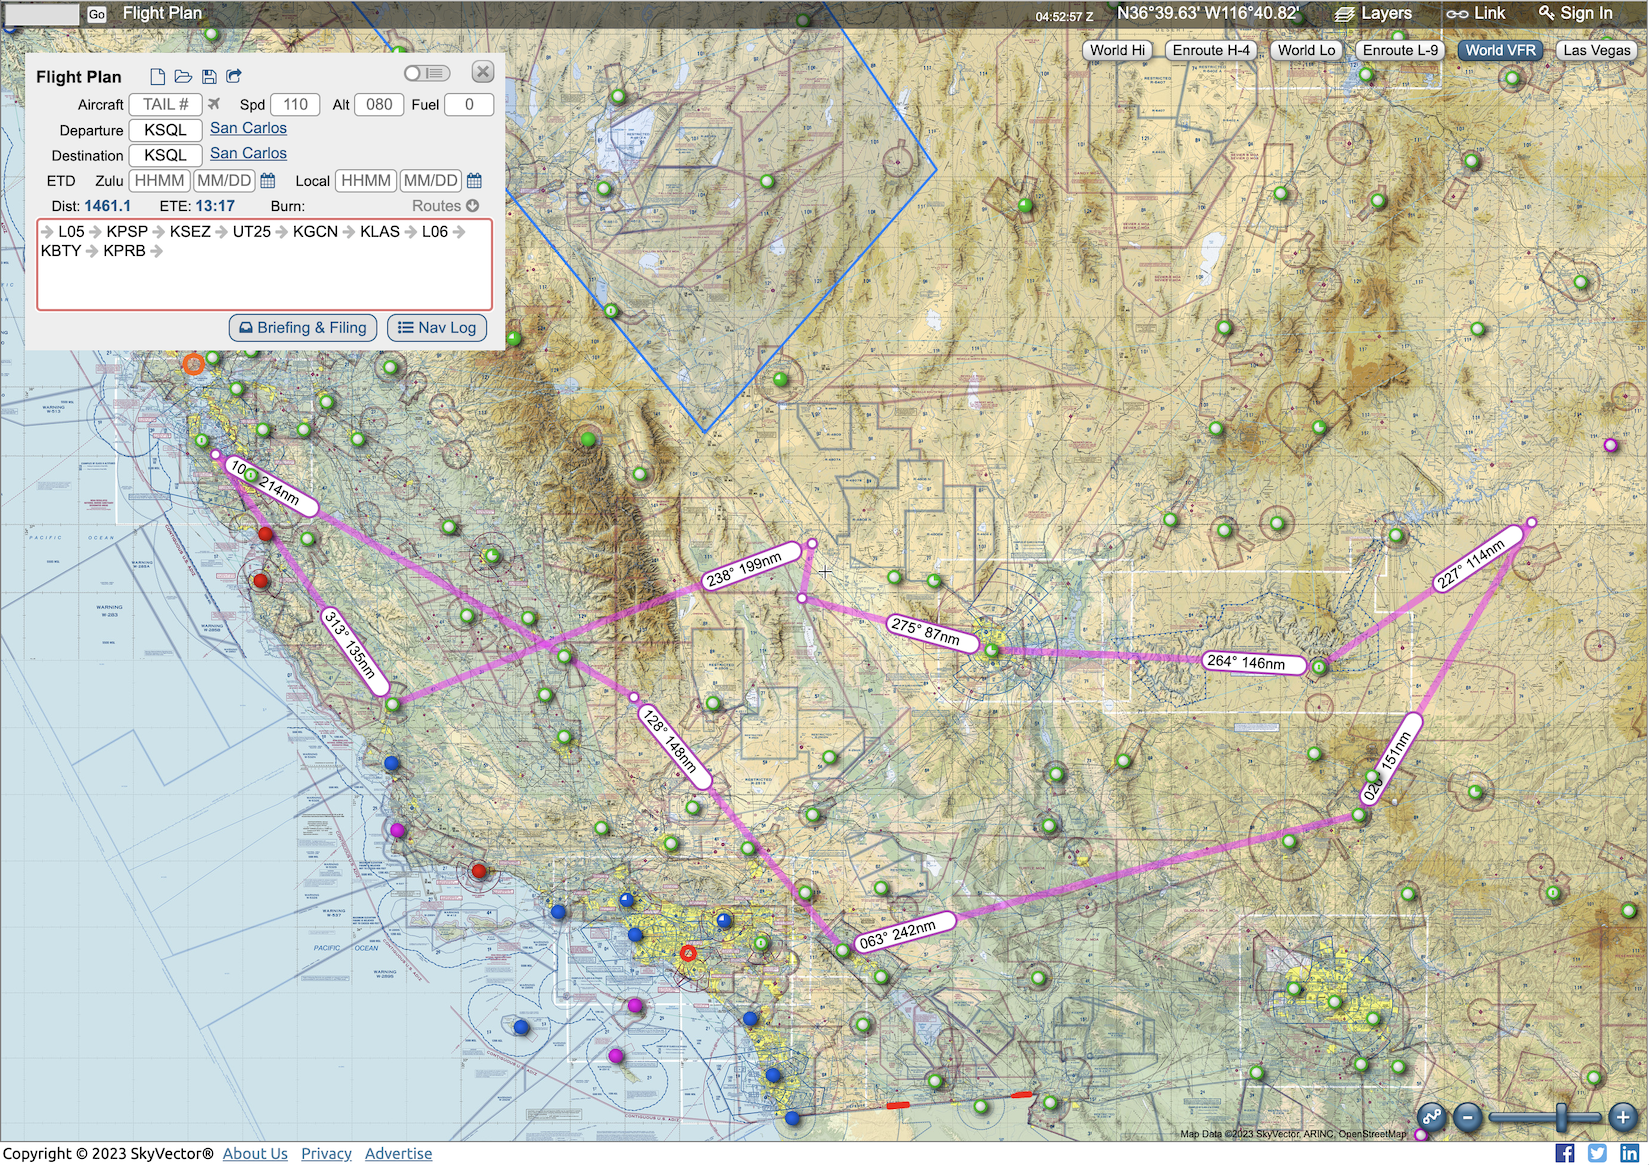
This is a huge 4 days trip. We depart San Carlos, went to a small airport called Kern Valley before ending the first day in Palm Springs. We visited the famous Sedona Airport and Monument Valley Airport the next day. The third day is a fun sightseeing day, Grand Canyon airport and SFRA, Zion National Park, Hoover Dam before landing in KLAS. Finally, we visited Furnace Creek (-210 MSL!) and Paso Robles for some lunch before coming back.
The group met up a couple days before to went over some routing options and leg assignments (we flew with 2 pilots + 1 CFI onboard, so we need to decide who flies which leg). We originally planned to go to Catalina Island and San Diego on Day 1 and Mammoth Lake on the last day. However, the weather was not good enough for those two days so we ended up with the route we have now. (Catalina was low IFR and Mammoth Lake had thunderstorm forming around it as we get closer.)
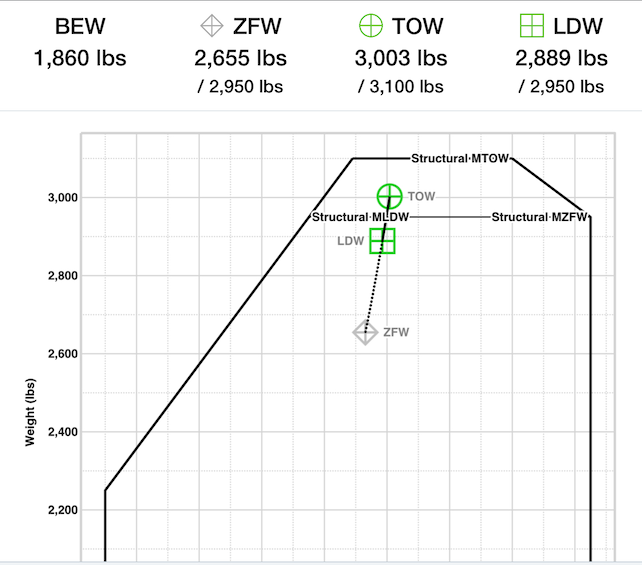
Since we're flying very close to max gross weight and we had to cover long distance, we have to plan the fuel requirements and stops very closely. Cessna 182 also have a difference in Maximum Take-Off Weight and Maximum Landing Weight, so we need to also have that in mind when planning how much fuel to load. Nothing too crazy, but just a bit of extra verification needed before each trip and fueling.
The weather briefing is also important. I knew we have radar image on FIS-B over ADS-B, however, I never really needed to check it in-flight and we had plenty reasons and opportunity to use it in this trip. The reason behind checking weather forecast products also become crystal clear this time as we'll be covering a huge area, we need to know how clouds and thunderstorms are forming and moving. These are just a couple things that did not click or make sense as a PPL who only flew locally — the weather tends to be pretty predictable and well-known and we only need to check a small area.
Let's talk about a few interesting airports:
L05 – Kern Valley
Kern Valley is a beautiful small airport. It even has a small dog park on the field (but I mean the dog kinda can just ... walk the airport right? 😅). Sadly the cafe was not open that day and the potty was a bit... needing maintenance.
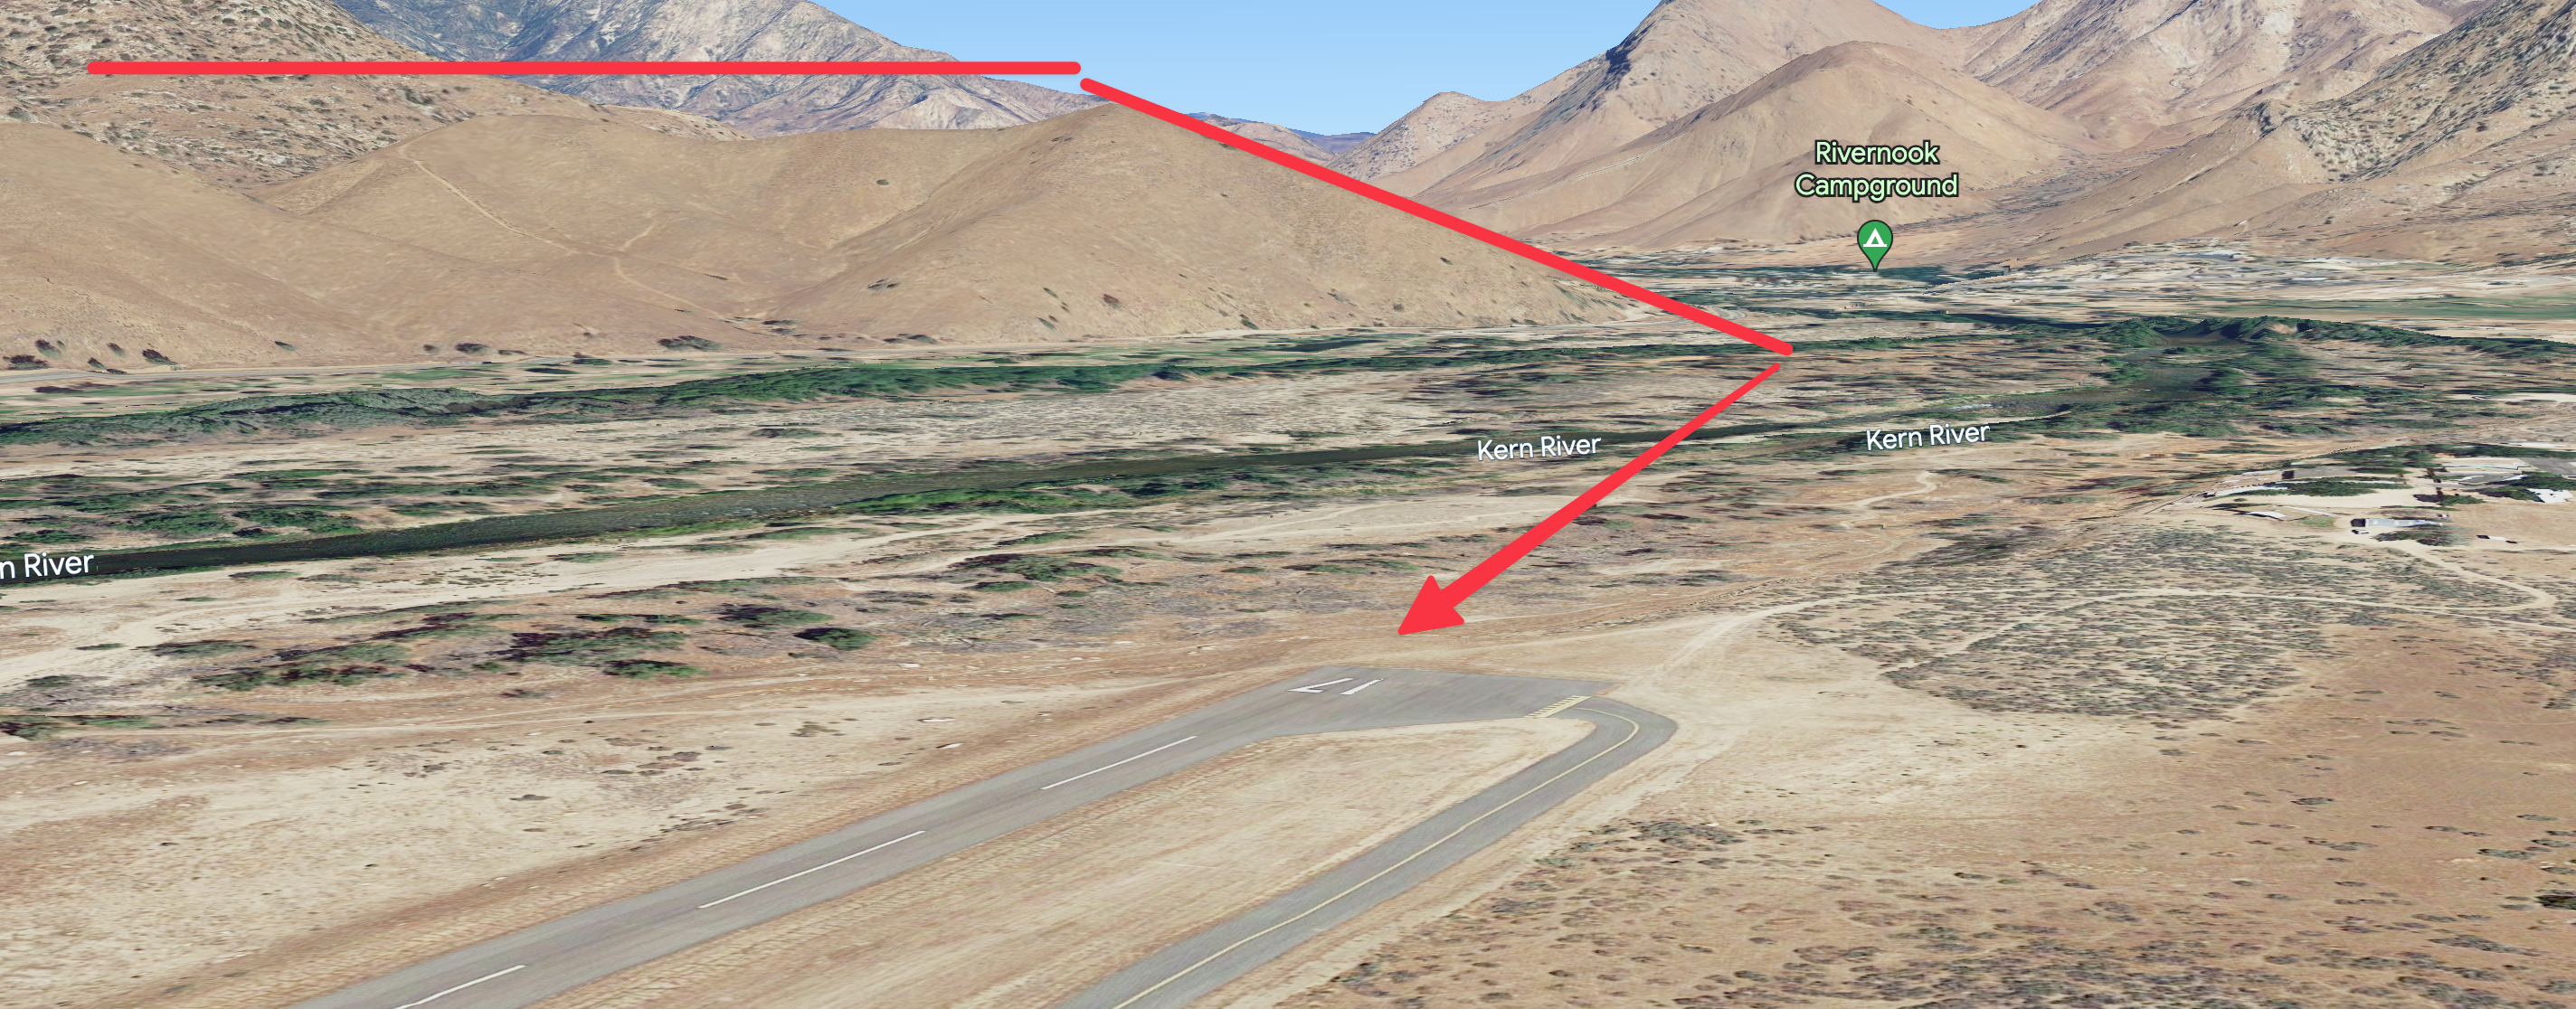
The airport is situated in a narrow valley on one side with some mounds on the other side. My dumbass was a bit too much distracted by the mounds and decided to turn a bit early, which put us high. I used forward slip to get us down there without gaining too much speed but we did land a little bit fast (~78 kts) but it was at least a smooth landing! Reflecting on it now, I probably should've just extend the downwind past the mound and take my time to do a longer final approach.
KPSP – Palm Springs
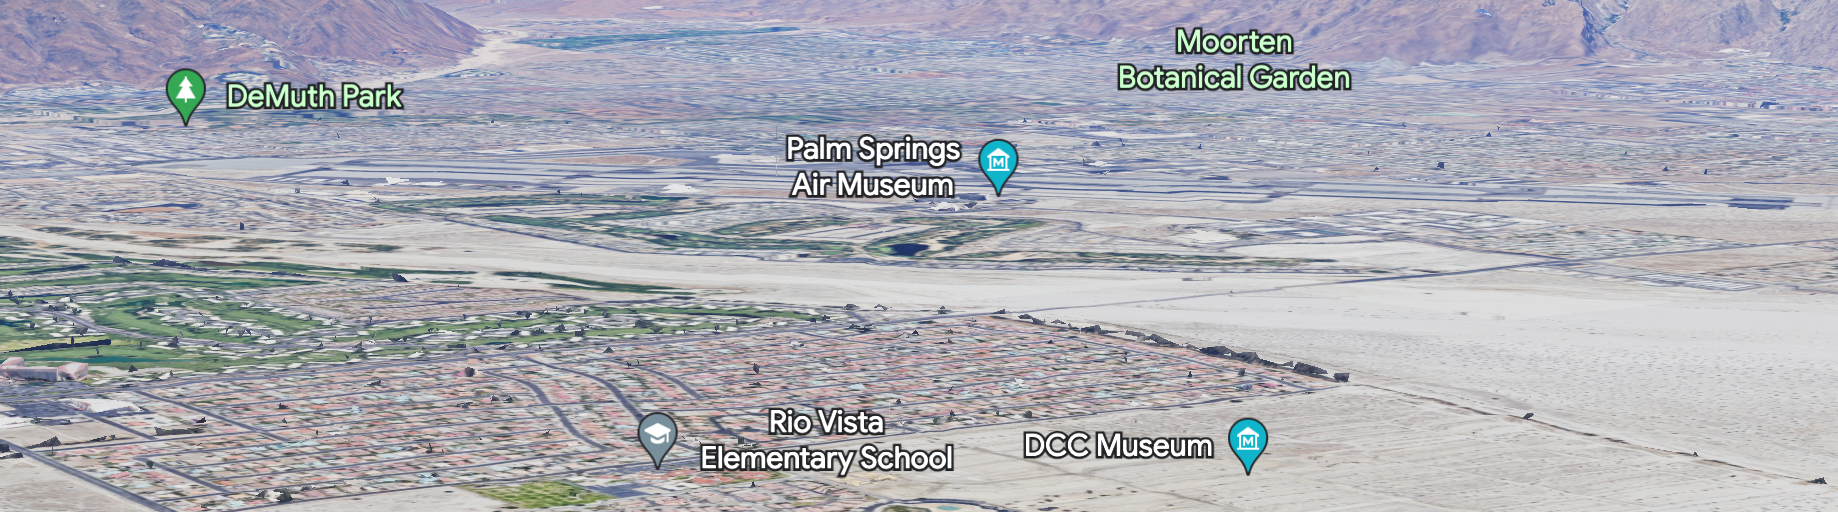
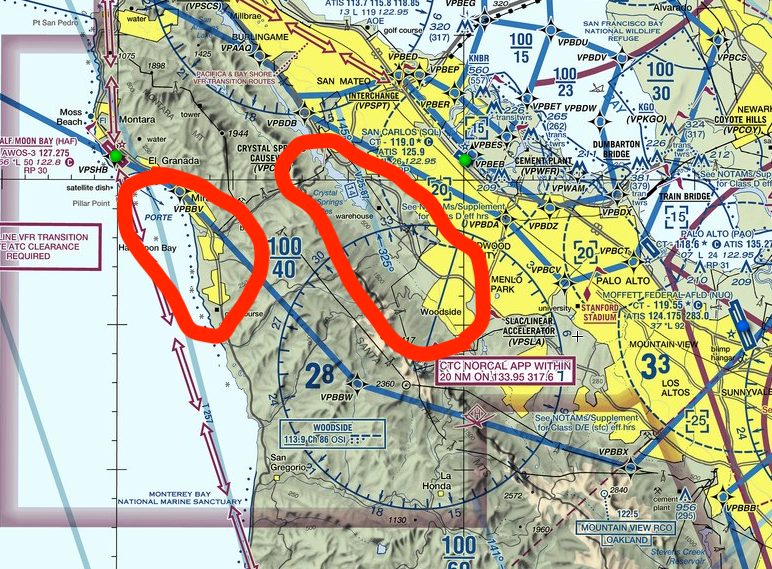
PSP is a Class Delta airport with a TRSA around it. It didn't feel any different to me as we were already on Flight Following with LA Center. We just following the instruction of the ATC and switch to PSP tower. We were given a right downwind 31R entry. Did you spot where the airport is in the picture above? Well, I didn't, the runway became much more clearer as we turn base. It just blends into the nearby city and desert too well. (Tip: The air museum is where the airport is!)
Runway 31R is the smaller runway closer to Atlantic Aviation which is the FBO we used over there. Watch out that this airport has arrival alert, Runway 31L/R and Taxiway C can be confused.
The airport is otherwise not too different but we were surprised to find out that on Thursday nights, Palm Springs downtown hosts a street festival which made the short overnight stay fun for us!
KSEZ – Sedona Airport
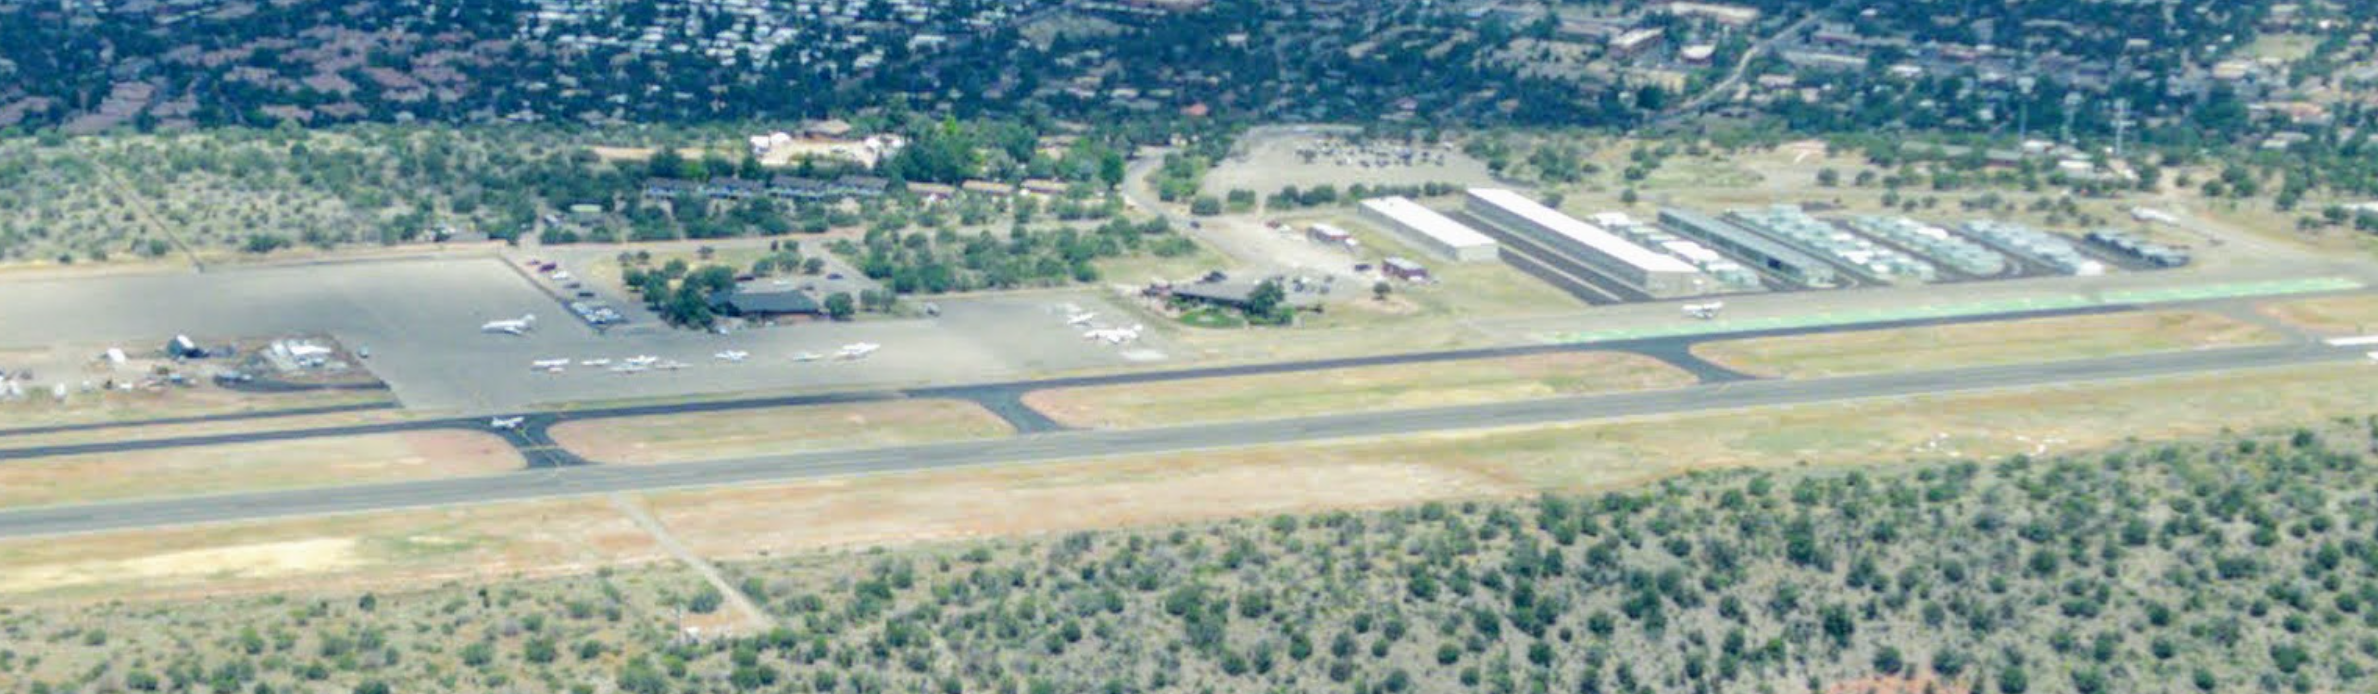
Sedona is a beautiful uncontrolled airport on a tabletop mesa. It does make you feel funny because when you're landing Runway 21, not only do you need to worry about the mountain right before the approach end but also the fact that approach end itself is a cliff. The airport is otherwise gorgeous and has a great view of the nearby area. Read the noise abatement procedure before you head in as the airport is right in the center of Sedona.
We didn't get to walk the trail that day due to developing weather but there is a trail around the airport. There is also a great restaurant on the field called Mesa Grill.
UT25 – Monument Valley
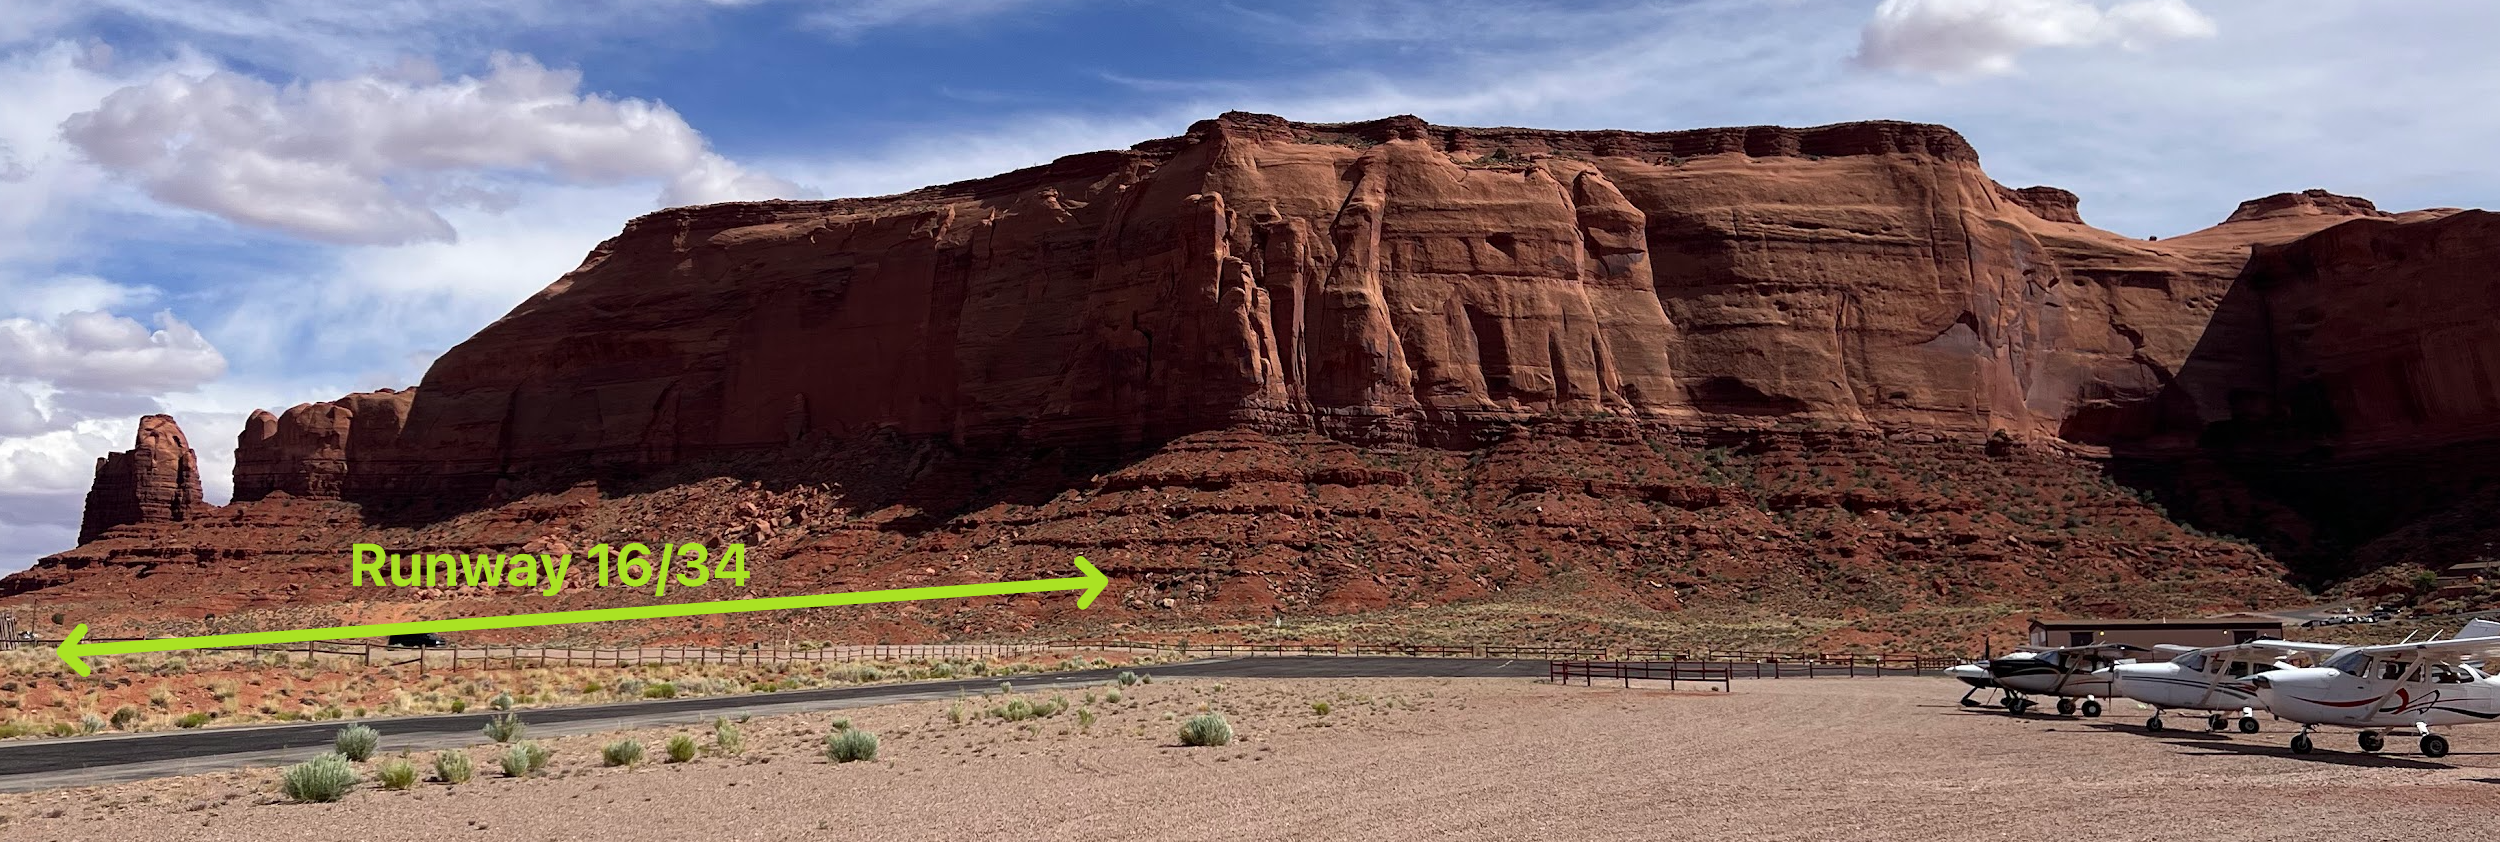
Such a fun airport to come into: one-way in/out, high elevation and narrow runway. UT25 is a private airport so prior authorization is required to land here. However, if you're a guest of the lodging nearby, I don't think there's going to be much of an issue getting a permission here. This is an one-way in, one-way out airport with a 45ft narrow runway, in fact, this is the narrowest runway I have ever landed on! The other side of the airport is a cliff, so you'll be landing 16 and departing 34. If you do need to go-around, do it early.
The runway itself is well-maintained, paved and sloped up 2.4deg on 16 which helps with slowing the airplane down. Make a stabilized approach and don't be surprised if your main gear touched down earlier than you expected (since it is an upslope) and maintain the centerline. It felt like quiet an accomplishment when I did it. I'm sure this is nothing for experienced pilots but for a month-old wet PPL holder, it felt like a strong confidence booster for myself.
Once landed, taxi off the runway to a dirt/stone parking area. Use soft-field techniques to taxi to avoid chipping your propeller, and ... treat yourself to the beautiful views around the valley! (The lodge nearby provides free shuttle service to and from the airport. They also have fun tours of the valley!)
Grand Canyon SFRA (Special Flight Rule Area)
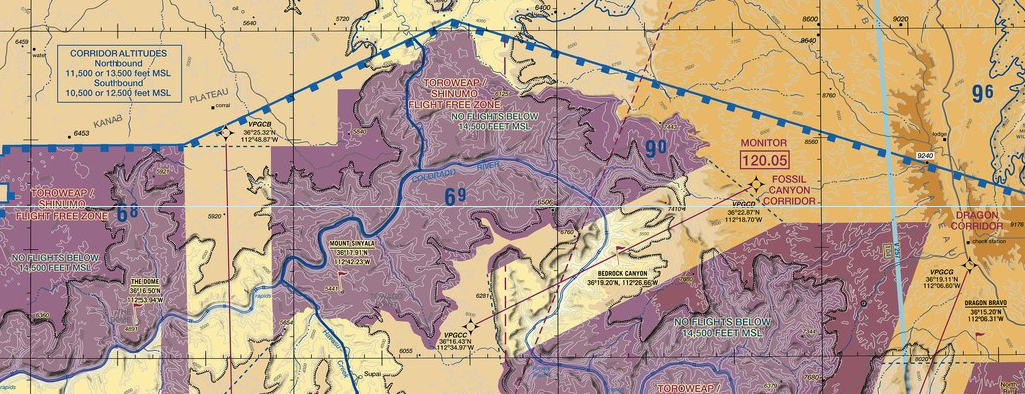
Grand Canyon is a hotspot for air tour operations so there are actually a specific routes assigned to air tours and general aviation. You can find the specific FAR here. The basic idea is you have to fly 10,500 MSL and above and monitor/announce on a specific channel depending on which sector you're in. There are also a specific altitude to fly if you're in one of the corridor. Note that flight following is also available here through LA Center but you do need to still monitor/announce on the local channel as well.
There is an airport (KGCN) here as well if you need fuel and bathroom, note the high level of helicopter traffic here. There is a FAA “From the Flight Deck” video for this airport. (Sidenote: I love this series of videos. I always check it before I go to a new airport, it gives you a quick overview of the airport, things to look out for (like arrival alerts) and sometimes approach tips too.)
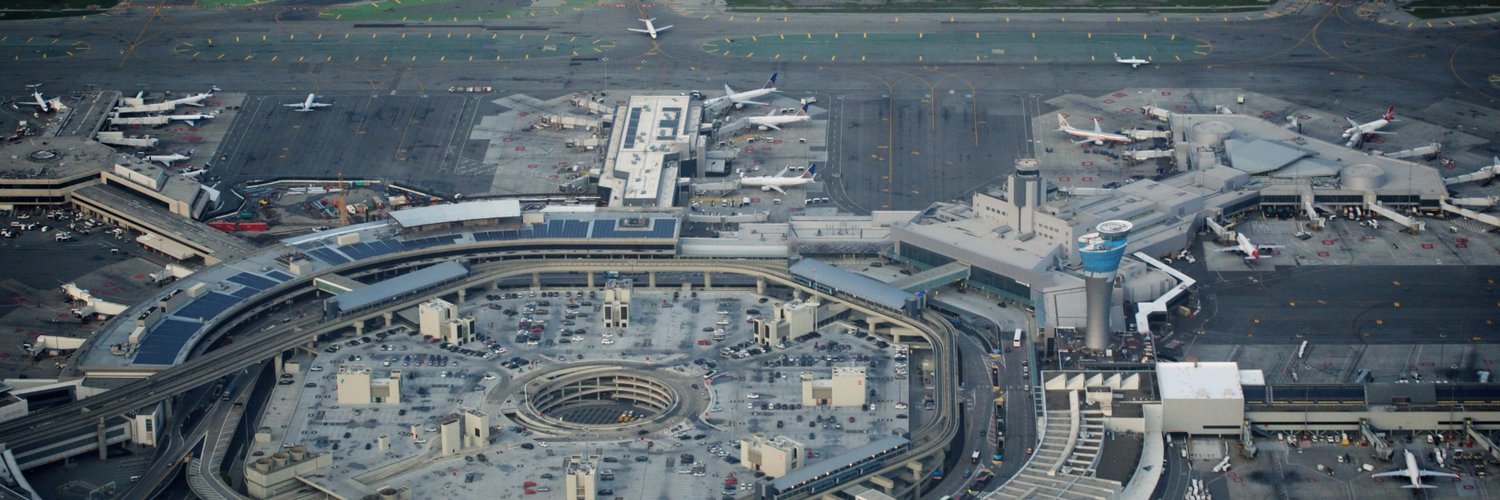
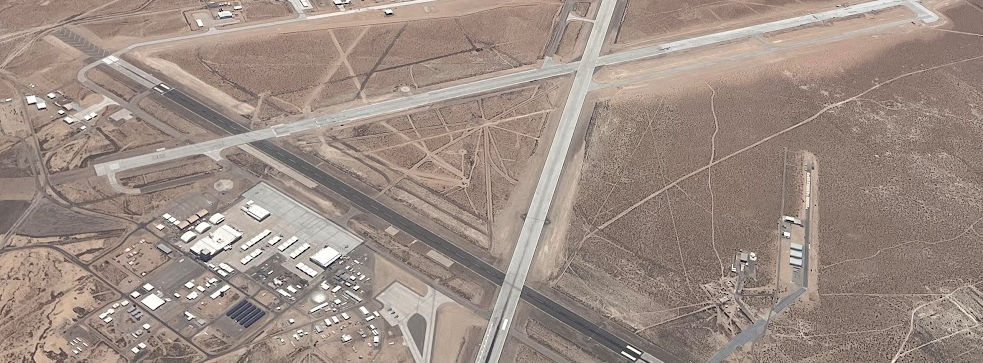
KLAS – Las Vegas Henry Reid International Airport

Another highlight of the trip! This is going to be my first landing in a Class Bravo airport. What is special about a Class Bravo airport? Uh, well I guess not that much really. 😅 However, for a pilot, going to where those big bois (airliners, jets, etc...) are, is pretty cool. Big airport sometimes also have much more expensive landing fee as well, SFO, for example, is ~$500 if you land there even in a single piston (aka small) airplane IIRC. We first head to Hoover Dam to do a tour, the Vegas approach was helpful and told us to stay outside of Bravo and let them know we're ready to head inbound, and to fly a south heading first. (Sidenote: Don't tell ATC you're going to Las Vegas since there are 3 airports around the area. ATC will ask you to confirm if it's Henry Reid, probably because not that many small airplanes go there.)
Once we called our inbound and fly the initial heading, they sent us to the south and basically fly a big downwind for 19L. 19R was closed for the day and there were also a NOTAM saying transient GA might not be allowed. We did made a reservation with Atlantic first so we were not expecting problems. (There are both Atlantic and Signature on the field, they're both next to the taxiway Hotel and on different end of the airport (North – Atlantic / South – Signature). If you're going to FBO, you're probably going to land on 19s because it's much closer and you usually see commercial traffic on 26s.
After the big downwind, we were restricted to 3500ft until 3nm final due to helicopter traffic, so time to pull another forward slip. (Because we're going to Atlantic which is on the approach end of 19 anyway, I didn't plan to land fast and long, but if you're going to Signature that might just work since 19L is 9771 feet long anyway! Note that after landing, the taxi instructions might be longer than what we've been accustomed to since there are multiple runways and taxiways (especially crossing runways is not a thing at the most airports I go to).
The Atlantic FBO is probably the best looking FBO I've ever seen, shiny building with a lot of amenities. I definitely felt under-dressed as every single pilot is in their uniforms. 😅
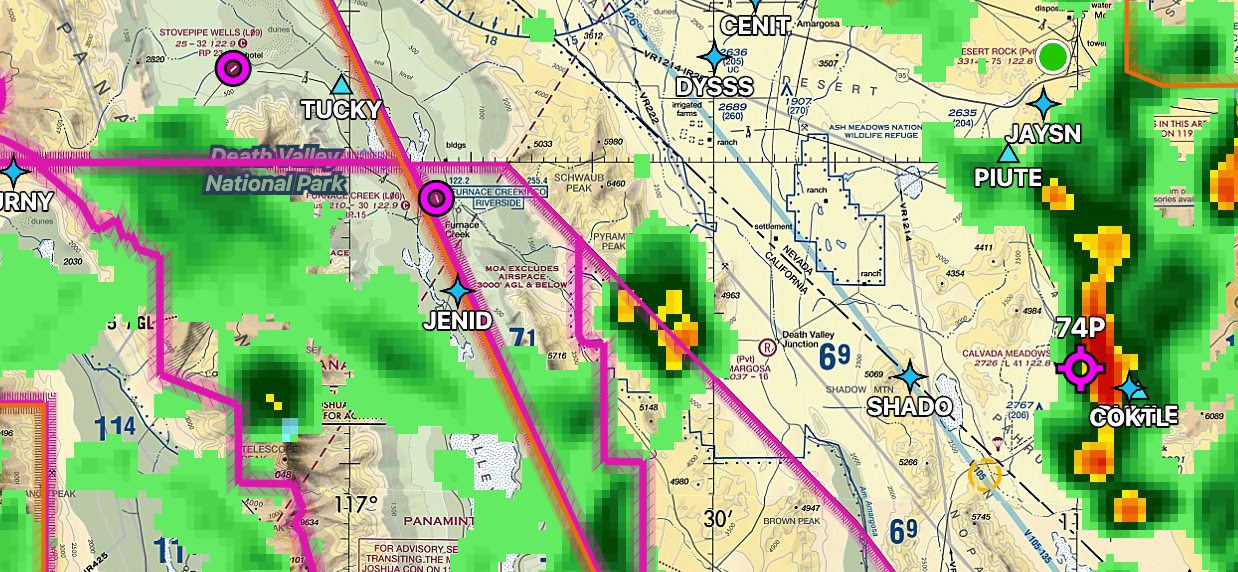
L06 – Furnace Creek & KBTY – Beatty
Furnace Creek is kind of famous. It is in the Death Valley National Park and the airport has a elevation of -210 MSL. Yes, minus, it is under the mean sea level! The airport is under a MOA so a bit of checking and altitude planning might be required depending on if MOA is active. Unfortunately, after two low passes, we've decided that the surface is a bit too rough and not to land there. With some proper soft field landing techniques, it is possibly fine to land on it but we really don't want to risk popping a tire out in nowhere. We diverted to Beatty which is just across the ridge for a quick rest stop. (I felt a bit nauseating at the point as a passenger as well. It usually isn't that big of a problem if I'm flying myself, but as a passenger, I do sometimes feel nauseating if it is too turbulent.)
Beatty is a small single runway airport, they do have fuel services and potentially a crew car and apparently some glider activities around it too. It also has a very clean potty, so highly recommended if you need a quick stop en route!
After that, we decided that going to Mammoth Lake is too risky due to a thunderstorm developing up there and we did not want to risk having to fly all the way back out again. We got cleared through R-2505 at or above 10,000 MSL, that means we get to flyover the China Lake NAWS, apparently it is where our Navy test new weapons and jets.
KPRB – Paso Robles
Our last stop before heading back to San Carlos. Paso Robles' transient parking is right across the terminal on the left side. FBO was very nice and has free crew car for 2 hours. We took the cars and head into downtown for some delicious taco before heading back. We flew by the Pinnacles National Park but I think this park is one of those that is better appreciated on the ground as it features a very cool cave systems.
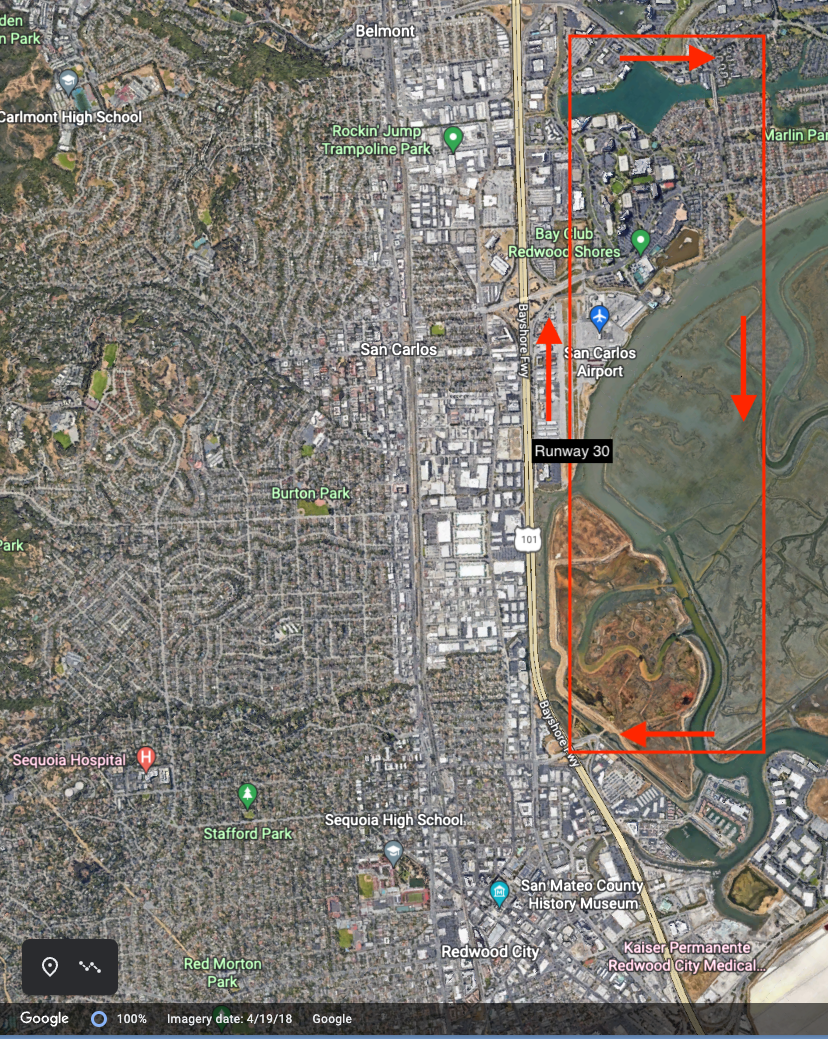
After that, not much happens, we flew by E16 and asked NorCal for flight following to KSQL. They cleared us through Moffett and Palo Alto Delta automatically. (which is rare, I usually get a frequency switch to Moffett tower and they pass me to Palo Alto and San Carlos) It makes the entire way super easy, we landed in San Carlos and ended this wonderful trip.
Thoughts
As I said earlier, I felt as a fresh Private Pilot, there were so many things that just isn't obviously clear to me about how to do it and why to do it. Plan for a long XC trip like this and get to land on big airports and high elevation airports really helps building confidence, knowing that I can actually do these as well.
It really also made me to have a newfound appreciation of the US. There are so many places that is pretty hard to reach by airlines + car (like Monument Valley for example), however, it is relatively easy to reach via a small airplane. I would love to explore more of those places in the future!
Thanks to San Carlos Flight Center to organize this trip!
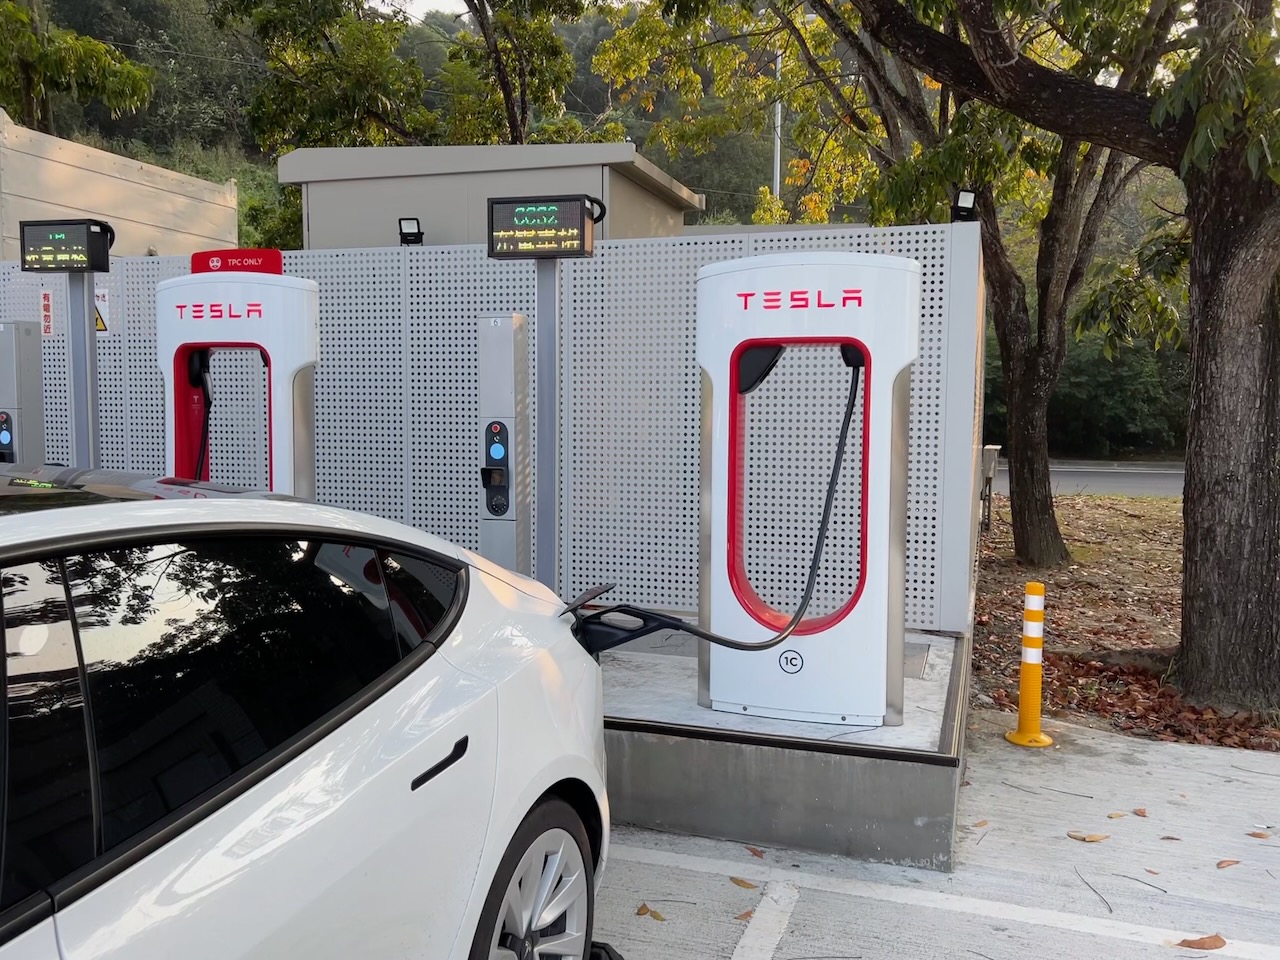
 ▲Tesla CCS2 cable plugged into the car and the NA plug from the same supercharger is shown
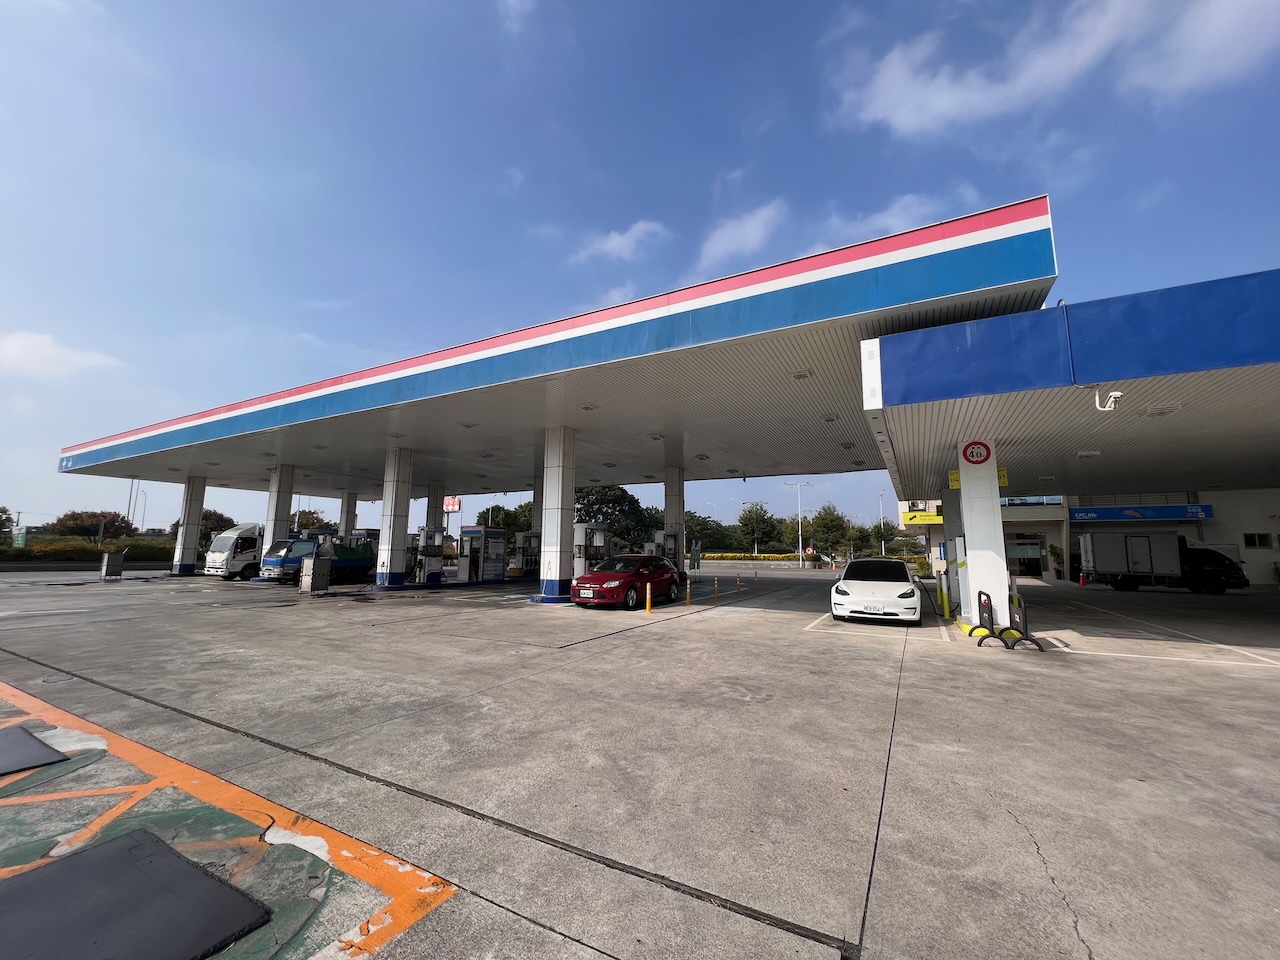 ▲Bonus pic: There's a gas station in highway rest area converted an island into EV charging stations.